Cairns Dirt Bike Technical Tips By Fair Dinkum Trail Bike Tours Cairns

Cape York Motorcycle Adventure Safaris
Fair Dinkum Bike Tours is a locally owned and operated company, established for 18 years by racing identity David Williams. Our commitment is making your dream trail bike tour or Cape York motorcycle adventure of a lifetime a reality, Dont trust your dream with just anybody ride with the experts.
Tech Tips
- Keihen FCR Carbys and Deep Water (4 Stroke Yamaha WR, KTM and Suzuki DRZ)
- Fitting heavy duty inner tubes to your dirt bike
- Alloy Throttle Tube for the Yamaha WR 250 and 450
- Swing Arm Slider Hints for Yamaha WR’s
- Changing the Suzuki DRZ 400 - KLX 400 oil filter
- KTM motorcycle rear wheel axle nut tips
- KTM Oil Sight Glass
- KTM spokes
- KTM leaking fork seals
- Suzuki - Kawasaki 400 throttle cable problems
- Suzuki - Kawasaki clutch cover fix
- Carby vent hoses (Yamaha, Suzuki, Honda, Kawasaki and KTM Keihin)
- Kehin Carby slides
- Front wheel bearings maintenance (Yamaha WR250 and 450)
- What is the correct fuel?
- Air Filter Maintenance
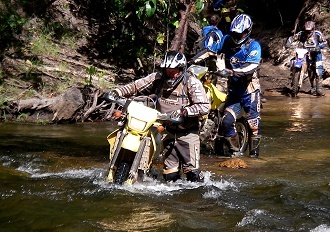
Keihen FCR carbys and deep water (4 Stroke Yamaha WR, KTM and Suzuki DRZ)
The vent hoses on the Keihen FCR carbys all hang down below the frame.
When you do a lot of water crossings and submerges, the vent hoses create an air lock and the bike then stalls during a deep crossing.

To fix the problem and ensure hassle-free water crossings where the vent hoses leave the carby on either side they tee off with a black tee and both hoses run down past the swing arm. Remove the tank and get one hose from either side and run them up along the frame rail under the tank and then hang them pointing down. (You may need to trim them a little.) Tuck them inside the zip ties already there. Replace the tank and the job’s done. Alternatively, you can place them inside the air box.
Fitting heavy duty inner tubes to your dirt bike
When fitting heavy-duty tubes make sure you put a coating of baby powder around the inside of the tyre as this helps with punctures.
Another top tech tip is to place the rim lock about 4 spokes away from the valve stem as this makes it easier to do a tube change in the bush.
I use the Metzler tyre levers as these are the best for getting the tyre on and off without the dreaded pinched tube syndrome.
Alloy Throttle Tube for the Yamaha WR 250 and 450
Fit an Alloy Works Connection throttle tube from BALLARDS for a light and smooth throttle. These are way better than the original plastic ones and won’t get damaged when you have a crash. Keep the original as a spare for big rides just in case.
Swing Arm Slider Hints for Yamaha WR’s
The black plastic chain slider on the swingarm is held on by 3 little bolts and recessed washers. These have a habit of vibrating out. Put a dab of silicone on them and then put them back in.
While you have the bolts out, run a bead of silicone under the chain slider where it sits on the swingarm. This will stop the chain from slapping, enabling a quieter run. Additionally, when your slider wears out it won’t chew into the swingarm.
Changing the Suzuki DRZ 400 - KLX 400 oil filter
When changing the oil filter on the Suzuki DRZ 400 / KLX 400 make sure you keep the little o-ring that sits inside the housing where the filter mounts. If you leave it out you will have a big end failure. Make sure it goes back in when putting a new filter in.
KTM motorcycle rear wheel axle nut tips
People tend to over tighten the rear wheel axle nut. This causes premature bearing failure. Remember you need to be able to undo the nut out in the bush. Make sure you have the correct spanner to fit and don’t over tighten when you’re in the workshop.
Keep an eye on the bearings as they have a bad habit of failing on a regular basis. When installing new bearings flick out the seal and use good quality grease inside the bearing and replace the seal.
KTM Oil Sight Glass
I have seen the KTM oil sight glass break so if this happens a 20 cent piece will fit neatly and devcon it in place. You then have to get a 2001 model dipstick with the rod to check the oil.
KTM spokes
KTM spokes can be another issue as they will break when doing a lot of long corrugations. Keep some as spares.
KTM leaking fork seals
The cause could be a little dirt trapped under the seal.
- Get a .004" feeler gauge and pop the wiper seal down the fork tube
- Get the feeler gauge and slide it up the fork leg and up under the seal
- Follow the fork tube around with the feeler gauge and the take out the feeler gauge to wipe it off.
This helps get the dirt out from under the seal. Check the fork leg for nicks and dents from rocks. If you find one get 1500 grit wet and dry paper and sand the nick back so it is not sharp.
Suzuki - Kawasaki 400 throttle cable problems
Keep a close eye on the throttle cables where they join onto the throttle wheel on the carby. The cables fray on the pull cable and snap after about 3000 - 4000 klms. When you have to replace the cables it is advisable to bend the cable holder in, so the cables are not pulling at such a large angle. You will notice the inner cables rub against the outer metal adjustment fittings.
Suzuki - Kawasaki clutch cover fix

The clutch cover on the bike is very prone to getting smashed when the brake lever is forced in during a fall.
You can help prevent this by taking the outer clutch cover off and getting a circular piece of alloy plate 3mm to fit on the outside of the cover and then sikaflex the plate on.
This helps to strengthen the cover quite considerably and if the brake lever does does have contact with the cover it will only depress the plate without breakage.
Carby vent hoses (Yamaha, Suzuki, Honda, Kawasaki and KTM Keihin)
It is a good idea to have little filters or breathers on the ends of the carby vent hoses as the carby sucks up dust and finds its way through to the inlet valves causing premature wear and adjustment.
To check this, take off the top plate of the carby which is held on with two allen head screws and see if dust is getting in. Dust is the major factor with valve problems so always have a clean airfilter and use good quality filter oil.
Kehin Carby slides

This is the front plate found on the latest Suzuki, Honda, KTM, Yamaha and other European models with the Kehin FCR carby.
As you can see the carby slide has broken off and gets sucked into the intake of the cylinder. This happens when the bike has done a lot of riding and after a while the plate wears at the bottom of the tabs and eventually fractures.
It is good practice to check for this as the broken piece normally gets wedged under the intake valve and you lose compression.
Front wheel bearings maintenance (Yamaha WR250 and 450)
The front wheel bearings on Yamaha WRs don’t have a dust seal. They will wear out pretty quickly. The best option is to replace the bearing with a dust seal and keep the original one's as spares.
Check the bearings by raising the wheel of the ground and rocking the wheel from side to side. If there is any movement, replace the bearings.
Use this method for the rear wheel too.
What is the correct fuel?
Where possible use a premium unleaded fuel to fill the tank.
I always carry octane booster and valve saver to add to the fuel. Keep a little bottle of each in your hydration pack.
Always add valve saver to each tank. Regular air filter maintenance will prevent a lot of valve problems on the new Four Strokes.
Air Filter Maintenance
Air filter maintenance is critically important to get right, especially in Australia as our continent is the oldest in the world and our dust particles are the finest.
The latest four strokes are very sensitive to dirty air filters. If they take in a lot of fine particles it promotes valve wear resulting in the need for regular valve clearances.
Make sure your filter is clean before every ride. Use a good quality air filter oil (not engine oil) and make sure you have it seated in the filter boot correctly.
When Washing your filter, wash it out in mineral turps and then hang out to dry. Don’t wash it in water after as the water will rot the foam and break down letting in more dirt.
Don’t wash your filter in petrol unless in a emergency. Petrol expands the foam and allows more dust in.
After your filter is dry add the filter oil and then mount it on the cage. Add a waterproof grease around the sealing surface and then mount the filter on the bike
Top Tip
Dewatering the Yellow Submarine (Suzuki DRZ 400)
There are two ways to drown your bike. The first is called a partial drown, the second, a total submerge.... .
Logically, a partial drown is easier to resolve. A total submerge can be tricky. Here’s a step by step guide to the dewatering techniques for the Suzuki DRZ 400.
Partial submerge procedure
- First remove the air box side cover to see whether any water has entered into the air filter box. If there is no water, check the exhaust has not been under water and filled the system because this would create another, separate issue which would fill up the engine cylinder with water.
- If the exhaust has a lot of water in it, it will be necessary to remove the spark plug and carry out the full submerge procedure. Do not attempt to start the bike. If you do and the engine is full of water, you will bend a con rod, requiring an engine removal and a hefty repair bill.
- We have established that the exhaust is clear and the airbox is clear. Now it is a simple matter of tipping the bike to the left hand side so that the foot peg reaches the ground. This will drain the carby bowl of fuel and water from the overflow tubes. No need to remove the carby drain bung at the bottom of the carby - this is a real nightmare to remove and replace.
- Hold the bike in that position for a 15 seconds, then bring the bike upright, try the starter with the choke on and no throttle. The bike should start.
- If the bike does not start, open the throttle wide for 5 seconds. Then release the throttle and try starting bike again. If it starts check throttle response - if it hesitates and cuts out there is still water in the carby. Repeats steps 3 and 4 until the bike starts.
Total submerge procedure
- Assuming the bike has been completely submerged underwater, the first thing to do is remove the side air box cover. Also remove the bottom drain grommet from the bottom of the air box and let the water drain from the air box. Then replace it.
- Remove the air filter and let it dry out in the sun.
- Remove the drain bung on the bottom of the carby (14mm). Drain out all the fuel and water.
- Then remove the seat, tank and spark plug.
- Next, up end the bike vertically by lifting from the front wheel so the exhaust is pointed to the ground. Excess water will run out from the exhaust.
- Crank the engine over but do so with caution - water in the engine will be forced out of the spark plug hole.
- Once all excess water is pumped out lower the bike back to the ground.
- Replace the carby drain bung, get a cigarette lighter and heat up the electrode of the spark plug. This will dry out the plug and help the bike to restart.. Replace the plug in the bike.
- Sit the tank on the bike and hook up the fuel line, turn on the tap, leave the air filter out.
- With the choke on, give the throttle 2 full turns and try to start the bike, leaving the throttle wide open for a couple of seconds whilst starting. If the bike doesn't start, close the throttle and try to start the bike again.
- If it fires but doesn't start, open the throttle slightly, while you start the bike. When the bike fires and runs then let it run with the throttle ¼ open for a minute.
- Now you can install the air filter, squeezing out any excess water and replace it back in the bike with the motor running.
- Last, mount the tank and seat back on the bike, If the bike hesitates with engine running, lean the bike over on it’s left had side to help drain any remaining water from the carby.
Ready to ride? Check out the Fair Dinkum Tours page.

